|
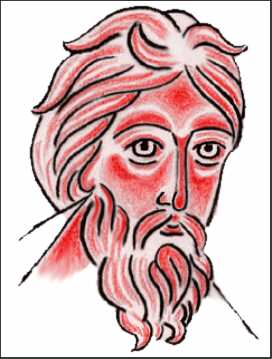
 |  |  |  ICON TECHNIQUE: Painting a face. ICON TECHNIQUE: Painting a face. |
|
Lining with a brush
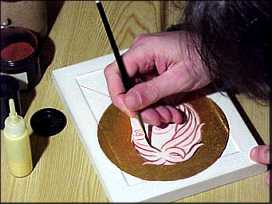
- Mix a very dry color from red ochre and a point of black;
- Redraw with the red ochre mix the lines of the face on the existing drawing;
- If the drawing of the face was engraved, it is not necessary to redraw the lines of the face.
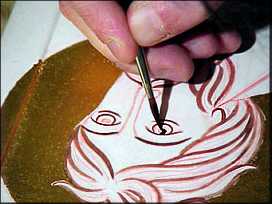
- Add more black to the mixture to trace the eyelids, eyebrows, eyes, pupils, ears, nostrils, lips and the tip of the nose;
- Also use this same mixture to redraw the hands and feet;
- The lines are reference marks and should appear through all the layers of the sanquir;
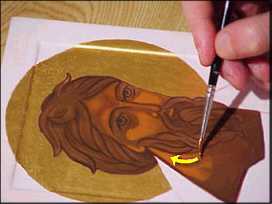
The basic sanquir
There are different tones of basic sanquir (proplasmos) and the one that is used should be chosen according to the school and the century from which the icon you want to interpret is derived. There are a great variety of sanquirs that are according to the school to which they are attached: dark brown-green from the School of Pskov, luminous brown-green from the school of Moscow, chocolate-brown from Greek iconography and from the Novgorod School, and brown-gilded from the Cretan School.
The color of sanquir we will illustrate is from the School of Novgorod.
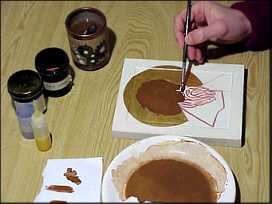
- Mix the sanquir according to the following proportions: three parts red ochre to one part yellow ochre. Mix with water;
- Add to the above mixture a little blue and emerald green to obtain a chocolate color;
- If the mixture is to red, add more of the yellow ochre, etc...
- Test the color on paper. Decide if it is a good color after it dries;
- The color should not be too transparent as it must contrast with the highlights;
- Add enough egg tempera to the basic layer to create a solid support for the layers of highlighting that will follow;
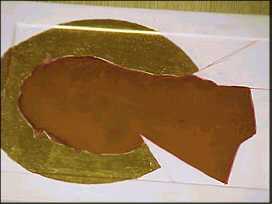
- Apply an opaque puddle over the entire face and neck starting at the top of the head and extending the puddle down until it has covered the entire area. Avoid "scraping" the board with the brush as you paint and do not go over what has been laid down;
- Apply the same sanquir "puddle" to the feet, hands, and other flesh parts of the icon;
- On a level horizontal surface, allow it to dry. Do not attempt to touch up any imperfections.
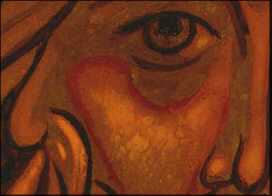
The first highlights
- Establish the areas to be highlighted. Preliminary studies on illustration board or mat board can be done and are very helpful in understanding the structure of highlighting. The areas that have the highest density of color indicate the areas where the highlights will be more intense.
- If the lines of some features have disappeared they should be redrawn;
- The color for highlighting should be mixed with egg tempera and a little water from one part yellow ochre to two parts red ochre;
- Apply by "puddling" starting from the area having the greatest highlight and extending the color by adding a little water to the mixture. Then push the brush back towards the area where the density of pigment is the greatest.
- Avoid "scraping" the background or "lifting" the pigment;
- Allow the "puddle" to dry completely.
- Blend any uneven areas by taking a little of the highlighting color and mixing it with egg tempera. Softly brush the pigment over the entire area that is highlighted. The object is to obtain a progressive gradation of color. Do this work with a very dry brush;
- If pigment is "lifted" creating a hole in the color, correct this with a small puddle of the basic "sanquir" color dropped into the precise area of the hole. Highlight over the "sanquir" and blend with delicate dry brushing.
The second highlights
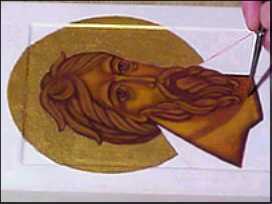
- Prepare a 1:1 mixture of red and yellow ochre. Make another "puddle" that reduces the surface of the highlighted area;
- Allow the "puddle" to dry completely;
- Brush the area with a mixture of egg tempera and a little of the highlighting mixture;
- Reline the eyes, eyebrows, eyes, tip of the nose, and outer line of the hair with a mixture of Burnt Sienna, a little black and red. Make this mixture quite dry.
The last highlights
The desired final look of the face determines the number of the following highlights and their intensity.
In general, avoid noticeable transitions between the successive highlighting layers.
Use titanium white sparingly and mix it with lead white (toxic) that is transparent and allows for soft transitions between the layers.
Alternate smaller and smaller "puddled" areas with delicate brushing. Some icon painters apply the final brushed layers by dry brushing and stumping. Do this with egg tempera that is quite dry. In the end the faces may appear to be bleached. It is possible to correct this with a red ochre glaze over the whole face. This will give it life again. Be careful when laying down a glaze to not over-brush the area. Rather allow the entire area to dry.

- "Enlivening lines" are fine small white lines that are placed at precise places on the face giving light to the face.
- This is a quite dry mix of titanium white and a little yellow ochre. Do not brush on these lines. Rather draw them as fine line so that they remain precise.
